HTS Settings
Settings
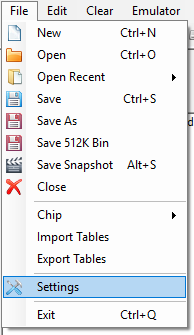
Select file -> Click on Settings.
Emulator setup page.

On this page starting at the top you have settings for emulation and datalogging.
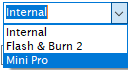
Click the emulator drop down and select the unit you are using.
**If your using a chip select ostrich as your emulator unit.
The "Realtime Update" check box means on connection the emulator will make
any changes to the rom as you make them in the software by default.
"Record on connection" check box means it will start saving the datalogging to memory
when you connect.
Moving down to serial ports you must select what port your emulator and datalogging
units are connected on. If you are unsure you can use device manager to work them out.
**As of writing "Auto-Scan Port" only work to find the "Demon" emulator.
"Check Emu Serial/VendorID" check box controls the code that pulls that info off the unit on connection.
"Bluetooth Datalog" check box extends the serial port connection time out since it can take longer for
bluetooth to open the port.
Serial Timeout(ms) is set to 80ms, some users will need to adjust this see debug logs for timeout messages.
** this depends on laptop speed, and the speed of your datalogger USB/Bluetooth/serial
Below you have Setting for controlling datalog sample rate.
This should be set to 0 unless your having issues with poor quality serial cable.
**Priorty in recording will increase the record threads priority at the expense of a smooth user interface.
Lastly you have setting for the Live Graph.
This can be very heavy on your laptops CPU and RAM.
**See Laptop Section for more info.
Units setup page.
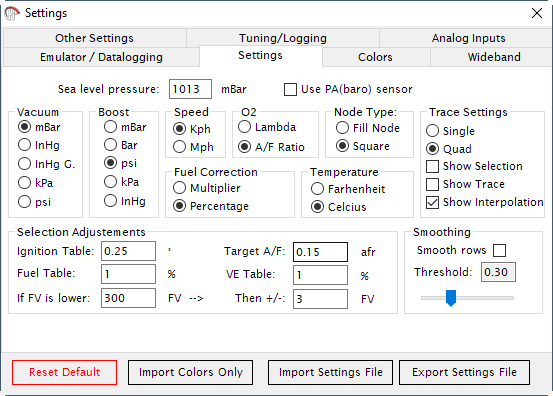
The Units page allows you to switch between common meteric and imperial units.
Sea level is also set in here which is used to determine atomosharic pressure if your ECU
isnt fitted with a PA(baro) sensor.
"Node type" setting switches between filling a full node or just a square.
"Trace Settings" selects how many cells should be highlighted.
"Section adjustments" define how fast changes are made when using shortcut keys.
Its best to leave this as default.
"Smoothing" This controls how much smoothing is applied between cells
When using the smooth table or selection function.
Colors Page
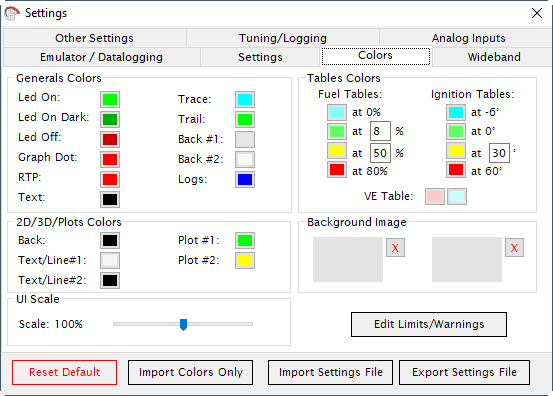
The colors for each item can be changed here.
A background image for the main window and table can also be set.
There is a button to open window to change the limits/warnings colors.
Wideband Page
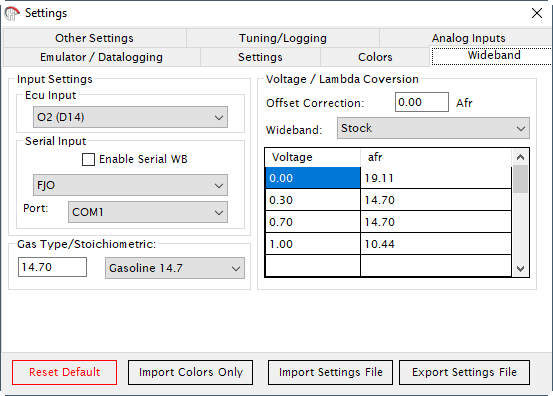
Select from the drop down menue what ECU input is being used to read the wideband from.
** D14 has a 0-3.8V range so recalibrate your widebands output scale if you want to log leaner then 17:1.**
Serial input will read a signal straight from your wideband if its one on the supported drop down list.
This is more accurate then using analog signals.
** Note that selecting Innovate widebands will add about 15secs to start up time on this program**
Gas Type/Stoichiometric is used to set what fuel type your runing for lambda conversions.
Voltage / Lambda Conversion sets up how the analog input signal is converted from voltage to AFR.
Offset correction is used for if there is a voltage difference between whats on the wire and what the ECU is reading.
Other Settings Page
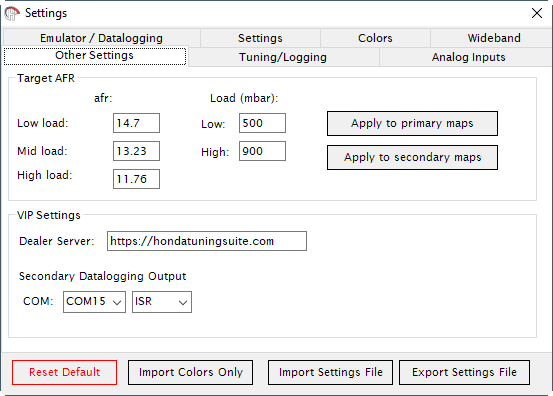
This page is used to generate the AFR target table, and setup the Secondary Datalogging output.
**See Datalogging section for more info
(Auto)tuning and logging Page.
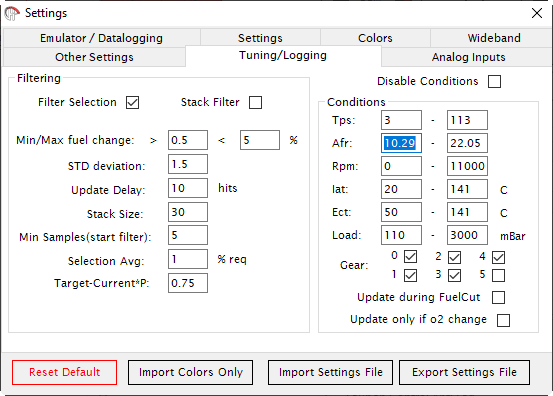
On this page you setup the auto tune and logging conditions.
"Filtering" selection check box will run the afr values though filter to remove outliers before applying average to them and showing on graph.
"Stack Filter" removes values that are satistically incorrect before applying filtering/averaging and showing them on graph.
Hover your mouse of the rest of the options for a explnation on what they do.
"Disable Conditions" check box changes if engine conditions need to be between these values for it to be logged.
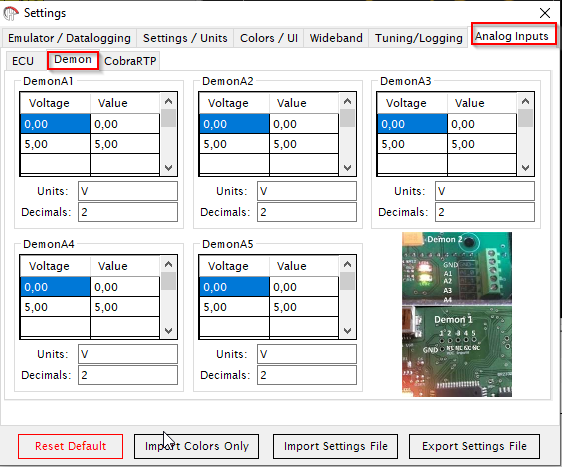
Analog Inputs Page
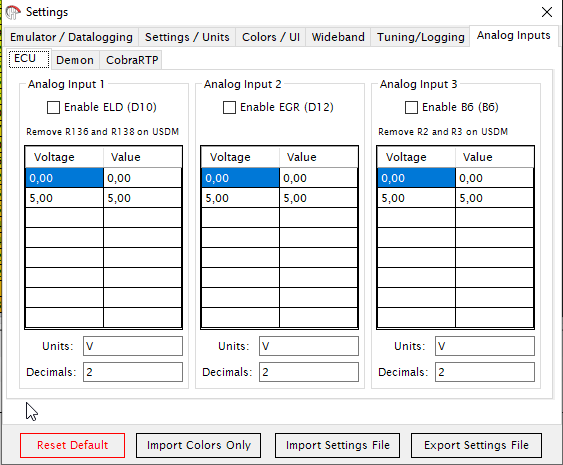
Enable logging of analog inputs to there own datalogging table and what range correction to apply on them for 0 to 5v signal
Demon 1 & 2:
CobraRTP:
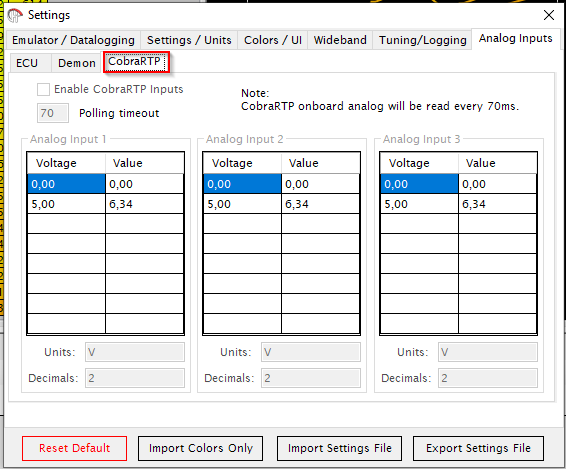
TBA: CobraRTP to be announced / Released. Work in progress.
Burner Page
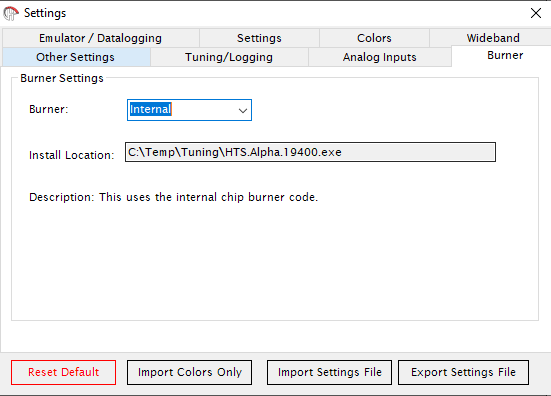
Options: